
This tutorial will show you how to make the ASP.NET forms authentication work with SQL Server using the provided ASPNETDB.MDF file. Then it will show you how to properly configure your web.config file to use it.
*Note – This tutorial will help if you are having trouble getting your forms based authentication to work in a shared hosting environment.
Visual Studio provides an excellent way to manage user authentication. ASP.NET forms authentication will require the user to enter a username and password. ASP.NET creates all of this for you. You can either do this with the login control, or choose the premade template when creating your site which includes the login control. It also has the redirect already set up (redirects user to login screen if not logged in or trying to access a restricted area). It stores the information in an ASPNETDB.MDF database file. The ASPNETDB.MDF file contains both the schema and data. You can create roles and access rules using this provided ASPNET.MDF file. You will use the, “ASP.NET Configuration” to make the access rules and roles.
Some of what the asp.net forms authentication can do.
- Creating new users and passwords.
- Store membership info
- Managing passwords, which includes creating, changing, and resetting.
The ASPNETDB.MDF file is added to your project and is in the App_Data folder.
*Note – You may need to run “ASP.NET Configuration” and refresh before the file will show up. You may also need to create a role and/or username. Roles are created when “ASP.NET Configuration” is run. You can register / creates a user account by running Register.ASPX in Visual Studio. It’s under the “Account” folder.
Some people have problems when trying to upload ASPNETDB.MDF file to their server and getting it to work properly, especially with shared hosting. Since the schema and data are so useful in the ASPNETDB.MDF file we’ll move it over to our SQL Server database.
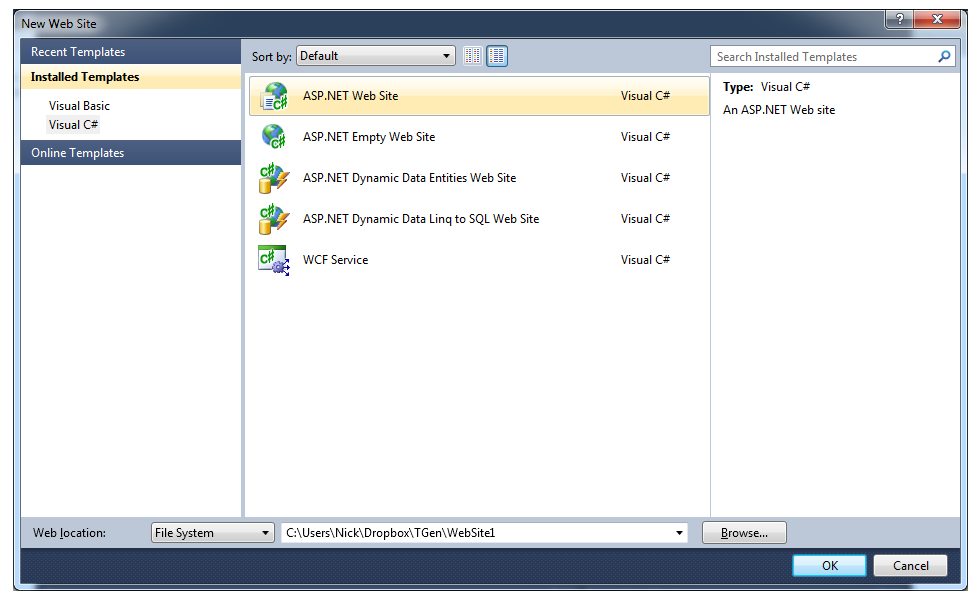
Start by choosing the ASP.NET Web Site template in Visual Studio.
The ASPNET.MDF File
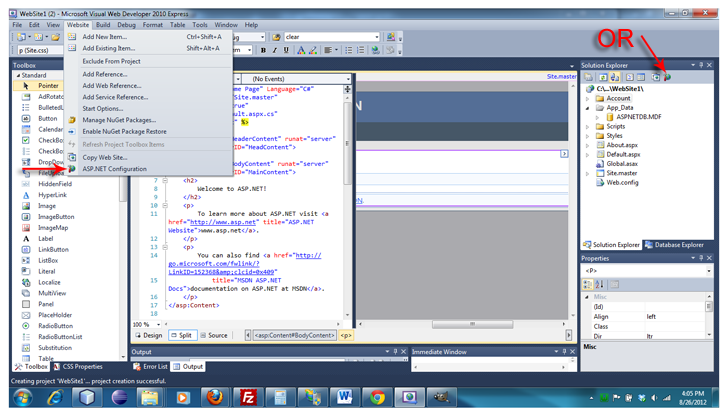
*To see the ASPNETDB.MDF file in your solution explorer, database explorer, or server explorer you may have to first run, “ASP.NET Configuration.” To do this, click ASP.NET Configuration in your Visual Studio menu under Websites > ASP.NET Configuration. Then refresh.
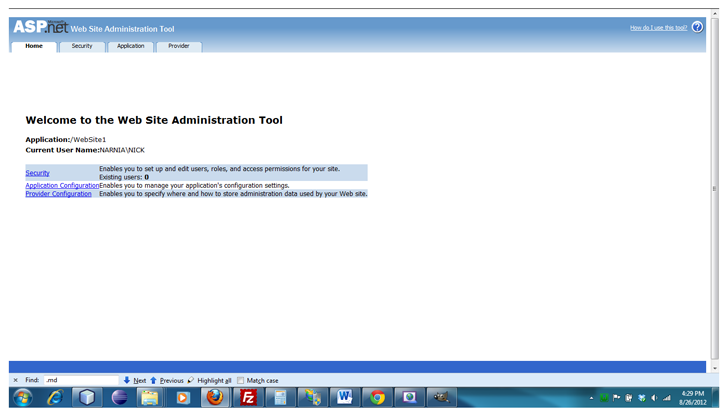
After running ASP.NET Configuration in Visual Studio in this screen will show in the browser. This is the ASP.net Web Site Administration Tool and is where Roles and Access Rules are managed.
Next right click the ASPNETDB.MDF file in your database explorer, server explorer, Solution Explorer. Select the option “Publish to Provider.” This creates a SQL script we can use in our SQL Server Management studio to recreate our database.
*Note – This is done differently depending on the version of Visual Studio used. Below I will show a couple of ways.
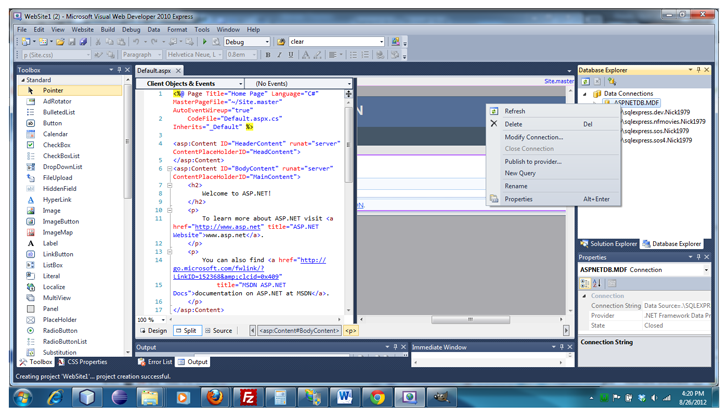
ASPNET.MDF in Visual Studio Express
Below is via “Database Explorer” in an express version of Visual Studio.
ASPNET.MDF is Visual Studio
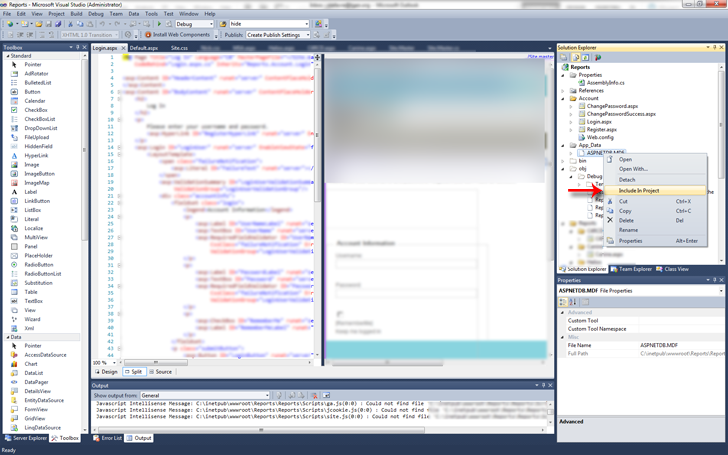
In a full version of Visual Studio, go under the “App_Data” folder, right click on the ASPNETDB.MDF file and click “Include In Project.”
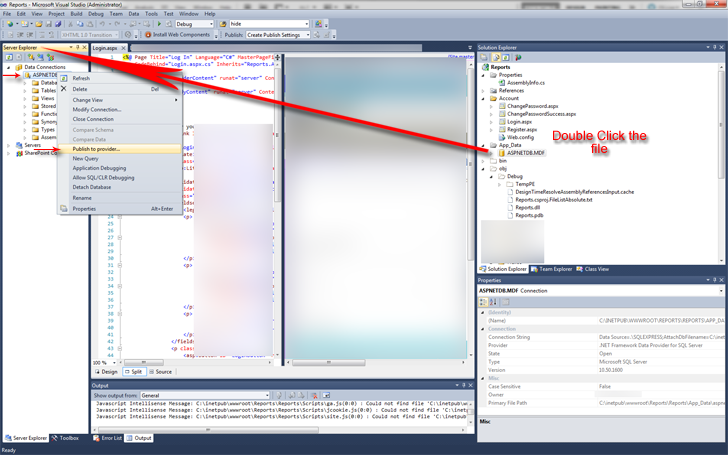
The icon for the ASPNETDB.MDF should turn a yellow/golden color. Double click the file. That should open the “Server Explorer,” where you can then right click the ASPNET.MDF file that is in the “Server Explorer,” select the option “Publish to Provider.”
Database Publishing Wizard
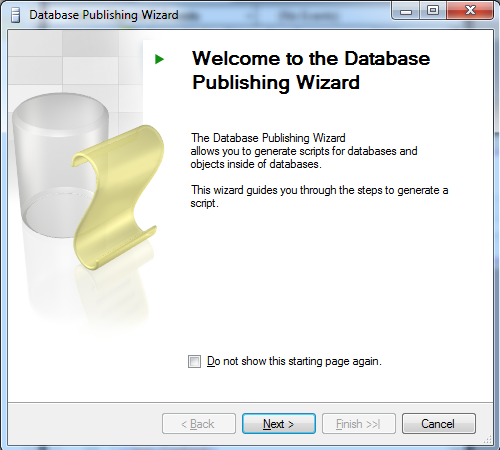
After you click “Publish to Provider,” a new window will open, “Welcome to the Database Publishing Wizard.”
ASPNET.MDF in Database Publishing Wizard
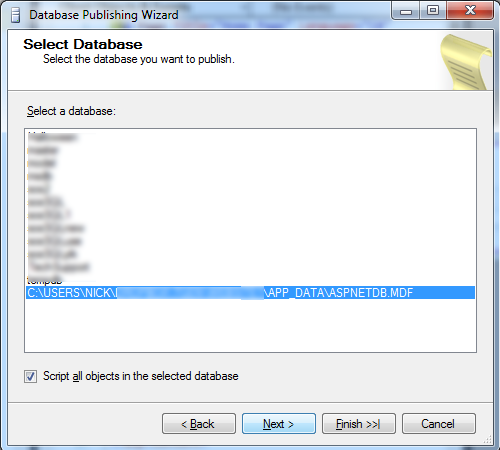
Select the ASPNET.MDF file and click next. Make sure, “Script all objects in the selected database” is checked.
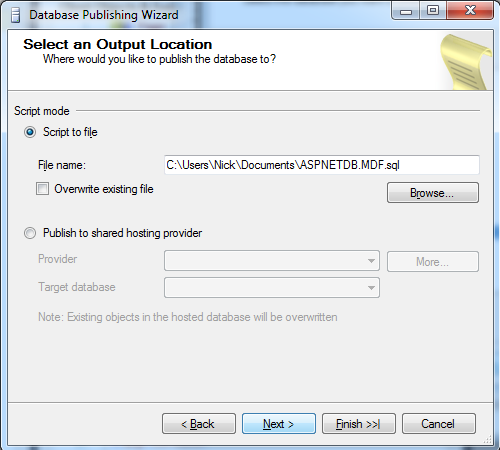
Now select the destination of the output for the script that will be created, and click next. Make note of where you are saving your file.
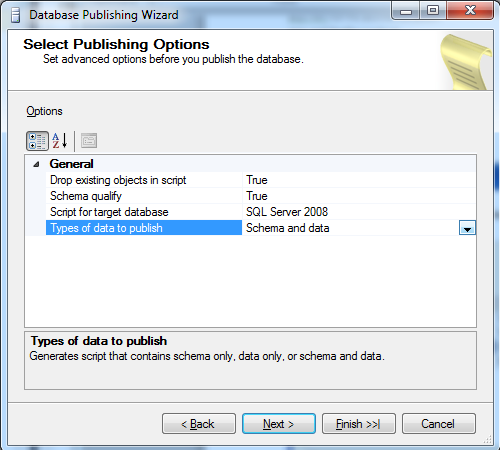
Select publishing options… Click next.
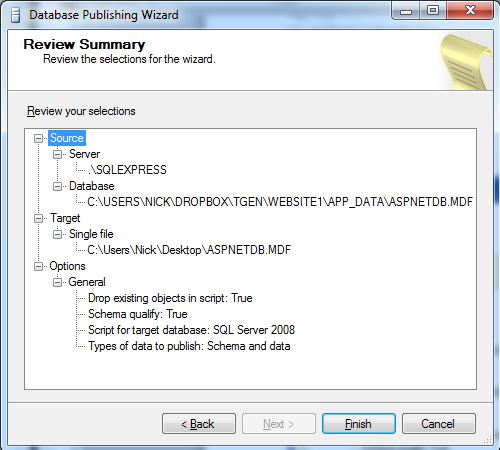
Now review and click, Finish.
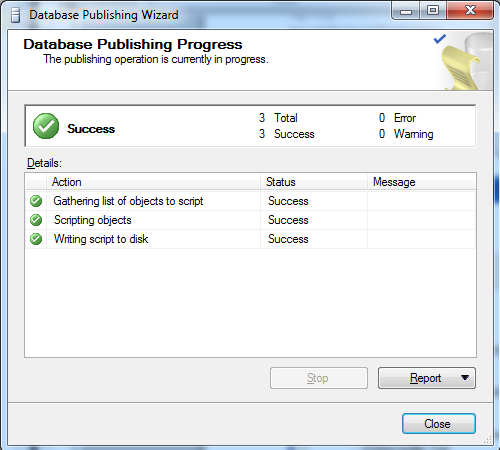
You should see a screen like below. Be patient, it may take a few minutes to complete. Once finished, click close.
Using SQL Server Management Studio to run the ASPNET.sql Script
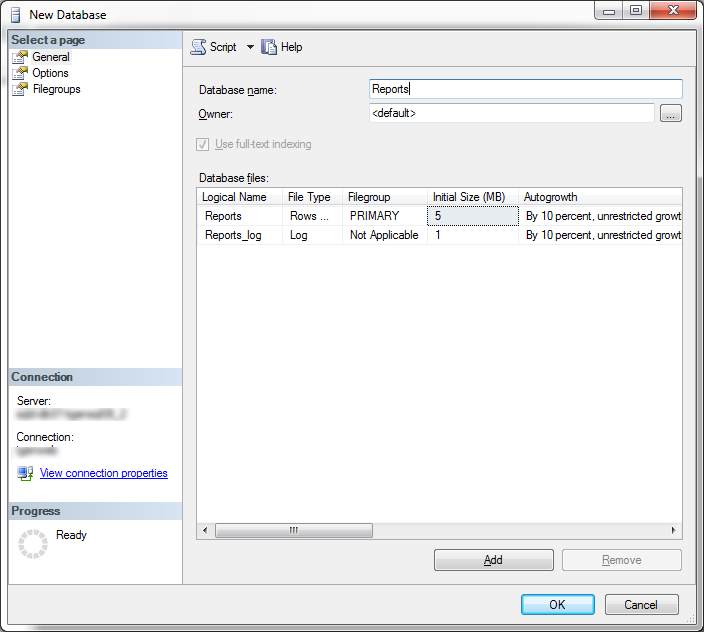
Now open SQL Server management Studio. Create a new blank database…..
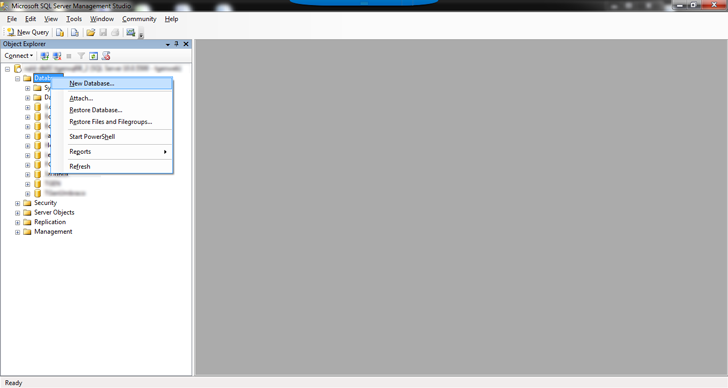
New Database:
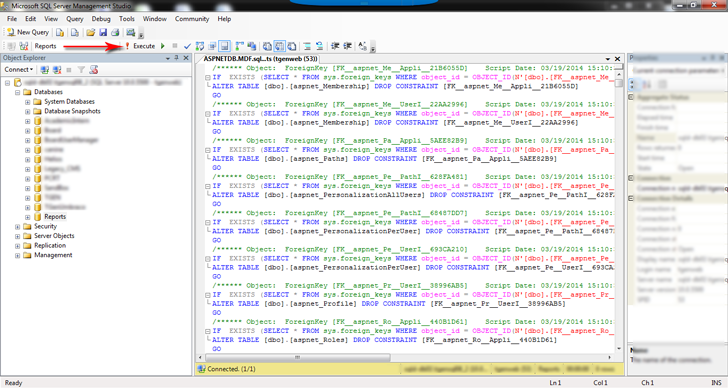
Double click on the sql (ASPNET.MDF.sql) file you just created to open it in SQL Server Management Studio. *It may look like ASPNET.MDF. The .sql is a hidden file extension.Make sure the new database you just created is selected. Execute the aspnetdb.mdf sql file you just loaded (the tab will need to be selected in SQL Server Management Studio). You are executing this script so that it will create the necessary tables, relationships, etc., into your new SQL Server database. You can now use this for your asp.net login.
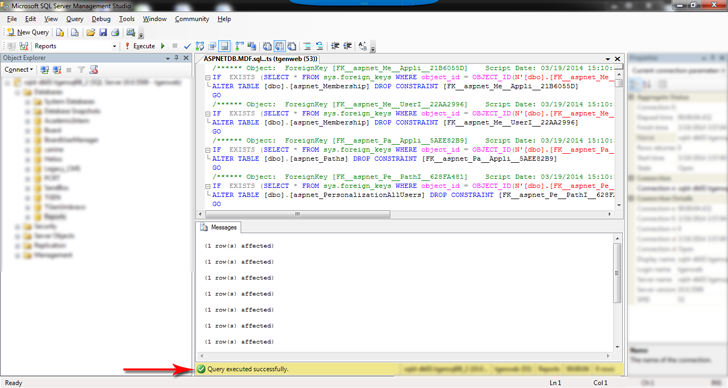
After execution it will look like below. You should be able to double click on the database you just created on the left and expand. Refresh. Expand the tables folder to see all of the tables the script just created.
Web.config Connection String
Almost There! Now that you have your DB setup, all that is left is to configure your web.config file to use the SQL Server Database you just created.
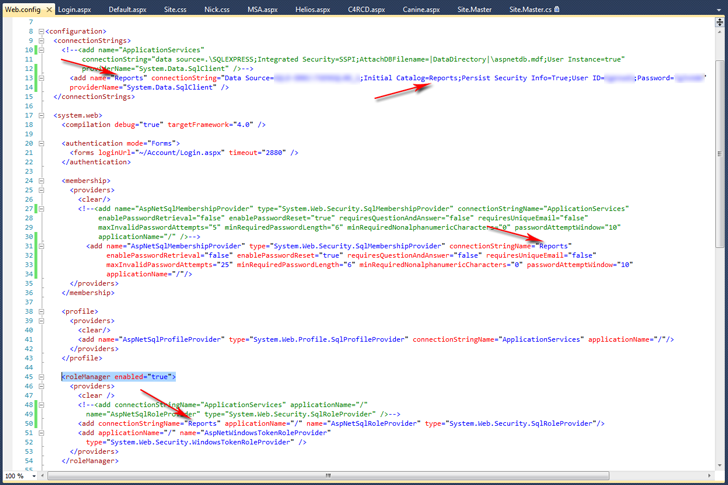
The asp.net login is still setup to use the default connection string of our original aspnet.mdf file. We need to change the connection string to the SQL Server Database we just made. We have 3 separate areas to update, <connectionStrings>, <membership>, and <roleManager>. The connection string needs to be updated to connect to the new database that was just made. Then there are <providers> tags. One is under<membership> and the other under <roleManager>. Update “connectionStringName” here to the same name as entered in <connectionStrings>.
For the connectionString, the “Data Source” should be the same as what is listed in the “Object Explorer” in SQL Server Management Studio. ID, and Password should be what was used to connect to the Database in SQL Server Management Studio.
See image below. The old connection information is commented out with the new information put in.
Here is sample code for the Web.config:
<configuration>
  <connectionStrings>
    <!--<add name="ApplicationServices"
         connectionString="data source=.\SQLEXPRESS;Integrated Security=SSPI;AttachDBFilename=|DataDirectory|\aspnetdb.mdf;User Instance=true"
         providerName="System.Data.SqlClient" />-->
      <add name="Reports" connectionString="Data Source=YOUR-SQL-DB;Initial Catalog=Reports;Persist Security Info=True;User ID=YOURID;Password=YOURPASSWORD"
      providerName="System.Data.SqlClient" />
  </connectionStrings>

  <system.web>
    <compilation debug="true" targetFramework="4.0" />

    <authentication mode="Forms">
      <forms loginUrl="~/Account/Login.aspx" timeout="2880" />
    </authentication>

    <membership>
      <providers>
        <clear/>
        <!--<add name="AspNetSqlMembershipProvider" type="System.Web.Security.SqlMembershipProvider" connectionStringName="ApplicationServices"
             enablePasswordRetrieval="false" enablePasswordReset="true" requiresQuestionAndAnswer="false" requiresUniqueEmail="false"
             maxInvalidPasswordAttempts="5" minRequiredPasswordLength="6" minRequiredNonalphanumericCharacters="0" passwordAttemptWindow="10"
             applicationName="/" />-->
          <add name="AspNetSqlMembershipProvider" type="System.Web.Security.SqlMembershipProvider" connectionStringName="Reports"
               enablePasswordRetrieval="false" enablePasswordReset="true" requiresQuestionAndAnswer="false" requiresUniqueEmail="false"
               maxInvalidPasswordAttempts="25" minRequiredPasswordLength="6" minRequiredNonalphanumericCharacters="0" passwordAttemptWindow="10"
               applicationName="/"/>
      </providers>
    </membership>

    <profile>
      <providers>
        <clear/>
        <add name="AspNetSqlProfileProvider" type="System.Web.Profile.SqlProfileProvider" connectionStringName="ApplicationServices" applicationName="/"/>
      </providers>
    </profile>

    <roleManager enabled="true">
      <providers>
        <clear />
        <!--<add connectionStringName="ApplicationServices" applicationName="/"
          name="AspNetSqlRoleProvider" type="System.Web.Security.SqlRoleProvider" />-->
        <add connectionStringName="Reports" applicationName="/" name="AspNetSqlRoleProvider" type="System.Web.Security.SqlRoleProvider"/>
        <add applicationName="/" name="AspNetWindowsTokenRoleProvider"
          type="System.Web.Security.WindowsTokenRoleProvider" />
      </providers>
    </roleManager>

  </system.web>

  <system.webServer>
     <modules runAllManagedModulesForAllRequests="true"/>
  </system.webServer>
</configuration>
Use Visual Studio to run the Login.aspx file located in the “Account” folder. You should see a login screen in your browser.


